

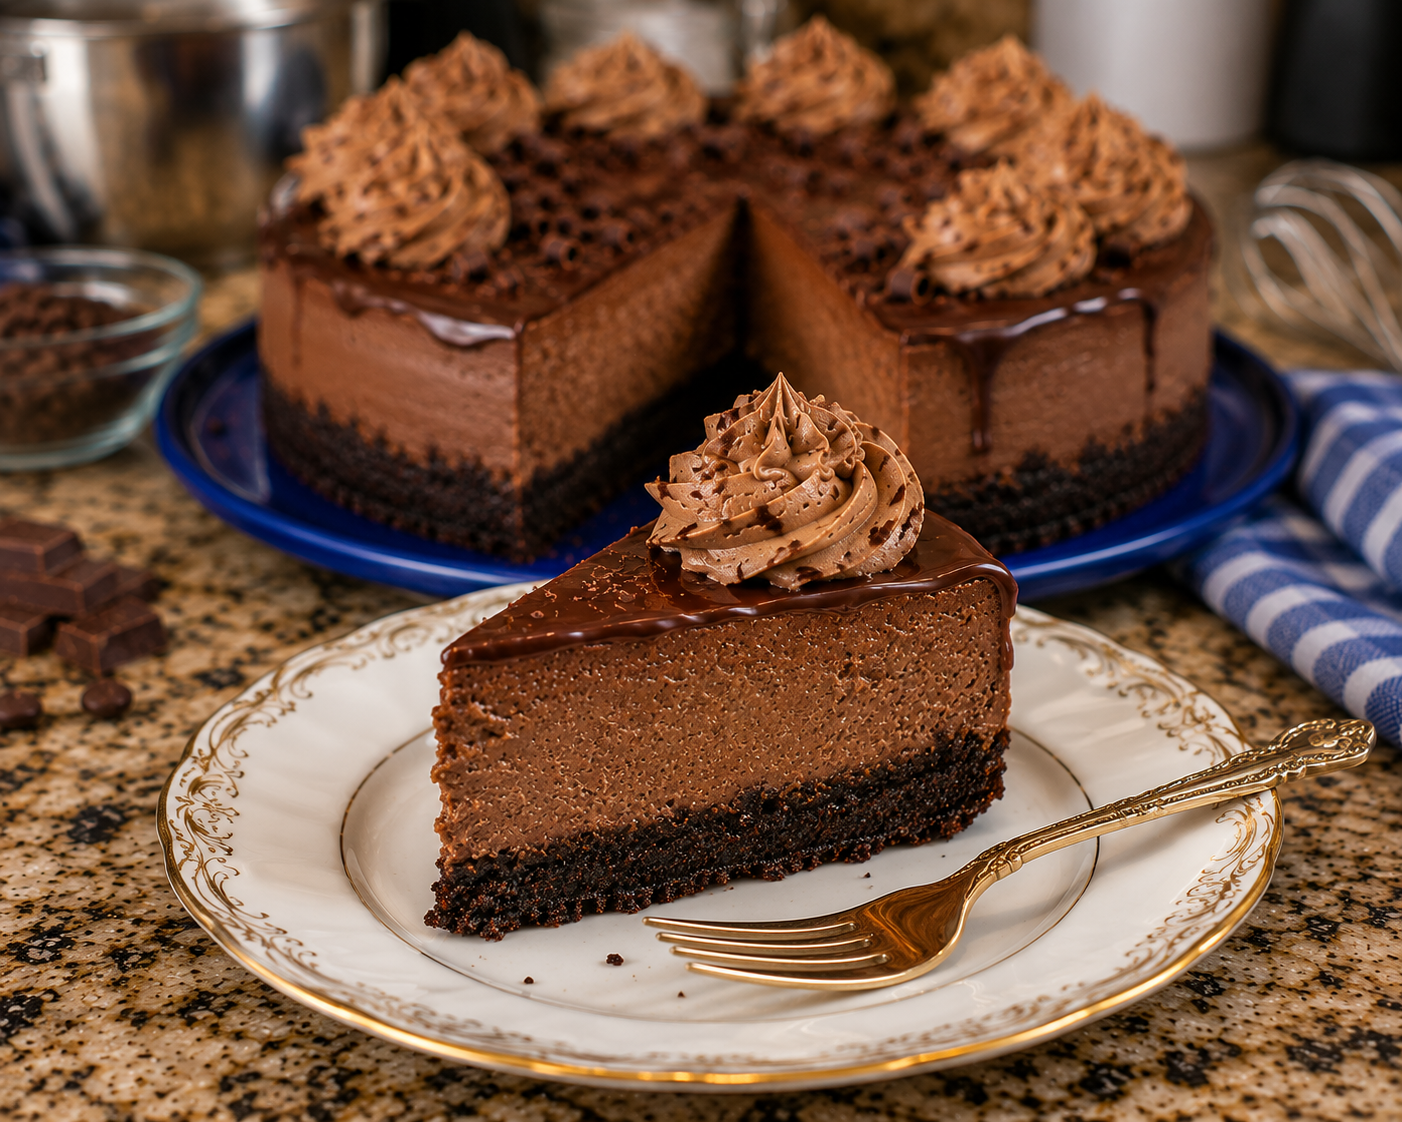
This Velvet Ganache Triple Chocolate Cheesecake may be the most decadent dessert you’ve ever made (or eaten). With a chocolate cookie crust, rich and creamy chocolate filling and topped with two different layers of velvety smooth chocolate ganache…it is beyond luxurious. This one has a few steps, but it is worth it! And, no one will believe you made it from scratch!
This also makes a great gift, hostess gift, or holiday/occasion presentation.
It is always a show-stopper.
With melted bittersweet chocolate, it more rich than sweet, though it will satisfy a sweet tooth. Also, with it’s deep chocolate flavor, it is easy to pair with fresh berries, homemade whipping cream, or just a cup of coffee.
This is the first recipe in a series of amazing (and tested) cheesecakes you can make yourself. A few basic tips that will be fully explained below: use quality ingredients, use a springform pan (details and a link below), and plan ahead — cheesecakes are best if they chill for a full 24 hours before eating!
This post may contain affiliate links. As an Amazon Associate, I earn from qualifying purchases at no extra cost to you.

Why This Velvet Ganache Triple Chocolate Cheesecake Works
I’ve been making cheesecakes for 40 years. I’ve made a lot of chocolate cheesecakes, but this is BY FAR, the best chocolate cheesecake I’ve ever made. I’ve tweaked a few things and now it is the only chocolate cheesecake I will make. It is creamy and velvety smooth. There is big chocolate taste, but not just sweet. It’s rich, but not overwhelming. And, no matter how many times I make it, it consistently comes out looking and tasting great! Triple Chocolate goodness, every time!
A few things that make the difference:
Three distinct uses of chocolate. The filling uses melted semi-sweet chocolate instead of cocoa powder. The ganache on top is more melted chocolate and cream — rich and glossy. Then, it’s topped with a whipped ganache that is light and airy.
Melting the chocolate into warm cream cheese. Some recipes ask you to fold melted chocolate into finished batter, which can seize or create streaks. Or worse, they contain cocoa powder which will not become creamy and full-flavored. Instead, for this cheesecake, you melt the chocolate separately and stream it into the cream cheese batter while the mixer runs on low. The warmth of the chocolate softens the cream cheese further, and you get a perfectly homogeneous batter with zero lumps.
Bake in a water bath. Yes, it’s one more step. But wrapping your pan in foil and baking in a ‘bath’ of hot water is the single biggest difference between a cracked cheesecake and a perfect one. The steam regulates the oven temperature and keeps the surface from drying out. It’s worth the time and effort!
The Springform Pan: It Matters & How to Use It.
Successful cheesecake baking doesn’t require much, but the right tools make a real difference. You can’t make a good cheesecake without a springform pan. A springform pan is two parts. A sturdy base and removable sides held by a tight-locking metal clasp. To remove the cake, you open the clasp and the sides expand and separate from the base so you can lift it off the cake. Quality matters here. You want a nonstick metal pan sturdy enough so it won’t warp or rust. I am a big fan of Wilton baking pans. The 9-inch pan is the most versatile and is less than $20.

This is my favorite pan. It is sturdy, won’t warp and has never rusted.
► GET IT ON AMAZON ◄
Pro tip: the base on a springform pan usually has a small lip around the outside. The base can be used upside down so the lip is facing down. This makes it easier to get the cake off the base. For best results when removing the cake from the pan:
- Turn the base upside down so the lip is facing down
- Place a piece of parchment paper on the base that extends beyond the edges of the pan
- Lock the sides in place with the parchment hanging outside the pan
Before You Start: Things to Know About Making a Successful Cheesecake
These are more than tips — they’re the difference between a creamy cheesecake with no cracks and one that cracks, sinks, or has a grainy texture.
Room temperature ingredients. Cold ingredients = lumps. Cream cheese, eggs, and sour cream should all sit out for 1-2 hours. Cold cream cheese doesn’t blend smooth; it leaves lumps that no amount of mixing will fix. If you’re in a rush, cut the cream cheese into cubes and spread them on a plate. They’ll warm up in 30 minutes. If you’re really in a pinch, pop them in the microwave for 4-6 seconds (minus the foil wrapper!)
Low speed mixing. You don’t want too much air in your batter. It causes the cheesecake to puff up while it’s baking and then it will sink when it cools, leaving cracks and even a sunken center. With a stand mixer, use the paddle attachment on low, the entire time, and scrape the bowl often. If using a hand mixer, keep it on low and be patient. Mix and scrape. Mix and scrape.
Melt chocolate gently. A double boiler (a bowl set over simmering water) is the safest method when melting chocolate. Depending on the amount of chocolate, I sometimes use a large pyrex measuring cup (like this one) and sit in in a small pan of water.
If you melt the chocolate in the microwave, use 20-second intervals and stir between each one. Chocolate goes from melted to scorched in seconds, and burnt chocolate separates and tastes bitter and grainy. Let the melted chocolate cool for a few minutes before adding it to the batter — if it’s too hot, it can cook the eggs on contact.
Don’t skip the water bath. I know. It’s a little more work and kind of obnoxious to deal with. But the steam from the water bath keeps the oven humid and the temperature even, which prevents the surface from drying out and cracking. Wrap the outside of your springform pan in two layers of heavy-duty aluminum foil (not regular foil — it tears). Don’t skimp here – a single layer will let water into your cake and the crust will be soggy. Set the pan in a larger pan with hot water. I used to dig out a huge roasting pan for this step, but now I use a jelly roll pan, lined with foil. I pour 1/4 – 1/2 inch of water around the cake pan and this is enough to do the job. Clean up is easy and it creates enough steam to protect your cake. If you use a deeper pan, you can add enough water to go about half way up the sides of your pan. Honestly, a little or a lot works the same here – you just need the steam and you need enough to last about an hour of baking.
Cool slowly, chill overnight. When the timer goes off and your cake has just enough jiggle in the middle, turn the oven off and crack the door open. Let the cheesecake sit in the oven cooling slowly for one full hour. Then move it to the counter until it reaches room temperature. Then cover and refrigerate for at least 8 hours. 12 hours is better. 24 hours is optimal. The slow cool down prevents surface cracks, and the refrigeration time ensures a creamy, dense, well-formed, perfect, slice.
Velvet Ganache Triple Chocolate Cheesecake — Full Recipe
Velvet Ganache Triple Chocolate Cheesecake
Equipment
- Springform Pan
Ingredients
Crust
- 25 Oreos crushed, with cream filling
- 4 tbsp butter
Filling
- 32 oz cream cheese, softened 4 blocks
- 1 cup granulated sugar
- 1 tbsp corn starch
- 1/3 cup sour cream
- 2 tsp vanilla
- 4 oz 60% cocoa dark chocolate melted & slightly cooled
- 4 oz 70% cocoa dark chocolate melted & slightly cooled
- 3 eggs
- 3 egg yolks
Ganache Topping
- 8 oz 60% chocolate, cut into small pieces
- 1 cup heavy cream
Instructions
- Preheat oven to 350℉
Prepare the Springform Pan
- Cover the base of the springform pan (lip-side down) with parchment paper, leaving paper hanging over on all sides. Attach sides of pan, leaving the excess parchment paper extended outside the pan.
- Cut two pieces of heavy duty foil slightly larger than the pan. Wrap the pan with the first piece of foil. Repeat with the second piece of foil. The foil should completely cover the bottom of the pan and reach up the sides almost to the top. Press the foil snug over the pan.
Prepare the Crust
- Place Oreos in a food processor and pulse until finely crushed (if a food processor is not available, place in a double zip lock bag, remove all of the air, and roll with a rolling pin until finely crushed.
- Place crushed Oreos in a bowl and add 4 tbsp melted butter. Mix with a fork until blended.
- Press the Oreo mixture into a solid layer on the bottom of the pan and at least half way up the sides.
- Bake the crust at 350℉ for 10 minutes. Remove from the oven and allow to cool while preparing the cheesecake.
Prepare the Filling
- Mix the softened cream cheese with the sugar and cornstarch on low for about 3 minutes, scraping the sides and bottom of the bowl often. The mixture should be velvety smooth. If lumps remain, continue mixing on low for another minute or until smooth. If the cream cheese has not fully softened before mixing with the sugar, it could become lumpy. It is important that it is smooth before continuing.
- Once velvety smooth, add the sour cream and vanilla and mix on low. While mixing, slowly add the melted and slightly cooled chocolate until fully incorporated. Scrape the sides and bottom of the bowl.
- Once the chocolate is completely mixed in, add eggs one at a time, mixing well after each addition. Scrape the sides and bottom of the bowl often.
Fill the Crust and Bake
- Gently pour the filling into the cooled crust. Place the filled springform pan in a roasting pan or jelly roll pan with sides at least one inch. Put the pan in the oven and pour boiling (or hot) water around the springform pan.
- Bake at 350℉ for one hour.
- After one hour, gently wiggle the pan. The cake should jiggle slightly in the middle, but not look too soft. If the middle looks under done, bake another 5 minutes. If the middle looks completely set, it may be overbaked and could crumble when sliced (it will still taste incredible!)Turn off the oven, crack the door and let the cake cool for another hour.
- Remove the cake from the water bath and cool for 1-2 hours on the counter and the move to the refrigerator for 8 hours or more (overnight for best flavor and texture)
Prepare the Cake for Ganache
- When the cake has fully cooled, unclasp the sides of the pan. If the sides separate easily, simply lift off. If some of the crust is sticking, run a knife around the edge before lifting off.
- Carefully, remove the base and the parchment paper and place your cake on its serving dish.
Ganache Topping + Whipped Ganache
- Finely chop 8 oz of dark chocolate and place it in a medium glass bowl.
- Slowly heat the cream to just boiling. Pour over chopped chocolate. Let the cream and chocolate sit for one minute and then stir until smooth and glossy.
- Allow the ganache to cool for approximately 3 minutes and spread half on top of the cooled cheesecake, spreading gently to the edges. Allow to cool completely before decorating with whipped ganache.
- Cool the remainder of the ganache for 15-20 minutes in the refrigerator. Once cooled, whip the ganache with an electric mixer until lighter in color and beginning to form stiff peaks. Place the whipped ganache in a piping bag and decorate your cheesecake.
How to Make the Ganache
The ganache provides a wonderful flavor and texture, but also elevates the appearance of this cheesecake (it will also cover up any imperfections if your cake doesn’t bake perfectly!)
Don’t be intimidated, it is easy to make.
Just heat heavy cream until it just barely simmers (small bubbles around the edges, not a rolling boil), then pour it over finely chopped dark baking chocolate. Let it sit for one minute without touching it. Then stir from the center outward in slow circles until it’s smooth, glossy, and pourable.
Let the ganache cool for several minutes and pour the ganache over the chilled cheesecake. Spread to the edges with a spatula. If you want a controlled drip look, use the back of a spoon to nudge the ganache over the edge in a few spots.
Final Chocolate Touch: Whipped Ganache
Start with ganache that is completely cooled or even chilled slightly in the refrigerator. This will not work if your ganache is still warm (I know this for a fact as I’m not always the most patient when finishing my project!)
In a bowl with tall sides (to prevent splashing), whip the ganache using a hand mixer on high speed. You will notice it thickening and the color will lighten. It just takes a minute or two (if your ganache is cool!).
Spread the whipped ganache onto your layer of chocolate ganache or pipe designs using a piping bag. The whipped ganache will hold up to any of your favorite piping bag designs!
Serving & Presentation
It’s already beautiful. It makes a perfect gift or dessert for any occasion. Here are some serving ideas.
The clean slice. Cut with a sharp, non-serrated knife. Run the knife under hot water first or fill a tall glass with very hot water and dip your knife blade in the water. Wipe the water off and make one cut. Repeat with a clean knife for every slice. This melts through the ganache and the cheesecake cleanly instead of dragging it. (Pro-tip: you can also sample a little cheesecake off the knife!)
Fresh Whipped cream. After all of your work, don’t insult your cheesecake with canned or frozen whipped topping. Use your stand mixer and fresh heavy whipping cream (cold). Add a teaspoon (or more, for sweetness) powdered sugar and a splash of vanilla. Whip until peaks form. Serve with the cheesecake or add more piping bag decorations!
Alternatively, if you’ve invested in a cream whipper, load it with cold, heavy cream, a teaspoon of powdered sugar, and a splash of vanilla. Charge the canister following the instructions that came with it.
The lightness of fresh whipped cream against the dense richness of the cheesecake is amazing.
Garnishes that work. Pick one or two, if desired.
- Chocolate shavings (use a vegetable peeler or cheese grater on a chocolate bar)
- A sprinkle of flaky sea salt
- A dusting of cocoa powder through a fine mesh sieve
- A few fresh raspberries or strawberries add color and flavor
Make it ahead. This cheesecake keeps beautifully in the refrigerator for up to 5 days, covered (with or without the ganache). The flavor actually improves on day two and three. You can also freeze it (without the ganache) for up to 2 months — thaw overnight in the fridge, then add fresh ganache before serving.
Variations & Substitutions
Swap the crust. Graham cracker crumbs work if you don’t want an Oreo crust, though you lose some chocolate intensity.
White chocolate ganache (or whipped ganache). For a striking two-tone look, use white chocolate and cream for one of the ganache toppings. The visual contrast of white ganache on dark filling is stunning, and the sweetness of white chocolate plays well against the bittersweet filling.
White chocolate is a very different ingredient and must be worked with differently. For white chocolate ganache use a 3:1 ratio (3 parts chocolate to 1 part cream). I would start with 18 oz of white chocolate and 6 oz of heavy cream and make more if needed.
This will also whip beautifully, but make sure the ganache is completely cold before whipping— it isn’t as forgiving as dark chocolate ganache.
Frequently Asked Questions
The oven was too hot, you mixed on too high a speed (incorporating air), or the cheesecake cooled too quickly. Maybe a combination of all three. A water bath and a slow cool-down in the oven will solve all three.
Pro-tip: the ganache will cover any cracks. Nobody will know. It will look and taste wonderful.
You can. Bake at 325 degrees instead of 350 degrees and add 10-15 minutes. the lower temperature will compensate somewhat but you may still get minor surface cracks.
The edges should be set and slightly puffed, but the center (roughly a 3-inch circle) should still jiggle like Jell-O when you gently shake the pan. It firms up as it cools. If the center is completely set in the oven, it’s overbaked and will be dry.
Chocolate chips contain stabilizers that resist melting. In a pinch, they can be used in the filling, but they won’t melt properly to make a smooth ganache. I strongly recommend baking chocolate bars like these Ghirardelli 60% Cacao Baking Bar or Guittard 64% Cacao Baking Bar.
The cheesecake (without ganache) can be made up to 3 days ahead and refrigerated, or frozen for up to 2 months. Add the ganache the day of serving for the best appearance. It keeps well for up to 5 days in the fridge, with or without the ganache.
No. A hand mixer on the lowest setting works, but you’ll need to be more vigilant about scraping the bowl and keeping the speed down. A stand mixer with a paddle attachment gives you more consistent results with less effort, but is not necessary for success.
Quick-Reference: Gear Used in This Recipe
| Tool | Why It Matters | Link |
|---|---|---|
| 9″ Springform Pan | Heavy duty, clean release, water bath compatible | Amazon → |
| Stand Mixer* | Low-speed paddle mixing = no air bubbles and easy to add ingredients while mixing | Amazon → |
| *Alternative Hand Mixer | Not as convenient, but less expensive and will still work fine in all your recipes | Amazon → |
| Gourmet Baking Chocolate | Smooth melt, rich flavor, glossy ganache | Amazon → |
| Cream Whipper | Professional whipped cream in 30 seconds | Amazon → |
As an Amazon Associate I earn from qualifying purchases


